Overview
Almost all of the projects we create in this bootcamp will be one of three types, for one of three corresponding purposes:
-
Gradle Java project
Use the Java language, with the Gradle build & dependency management toolset, to develop libraries or applications that target (run on) the Java virtual machine (JVM).
-
Gradle Android Java project
Use the Java language and the Android SDK, with the Gradle build & dependency management toolset, to develop libraries or applications that target the Android platform.
-
Spring Initializr Java & Maven project
Use the Java language, with the Maven buid & dependency management toolset, to develop enterprise-level applications that target the JVM.
Of course, these three project types are not the only options available for the intended purposes, just as IntelliJ IDEA is not the only IDE suitable for Java development. However, just as we have chosen to use IntelliJ IDEA, we’ve also chosen these project types.
The steps below walk through the process of creating the first type of project shown above: a Gradle Java project. We recommend that you watch the video prior to following the steps for the first time.
Video
Instructions
New project wizard
-
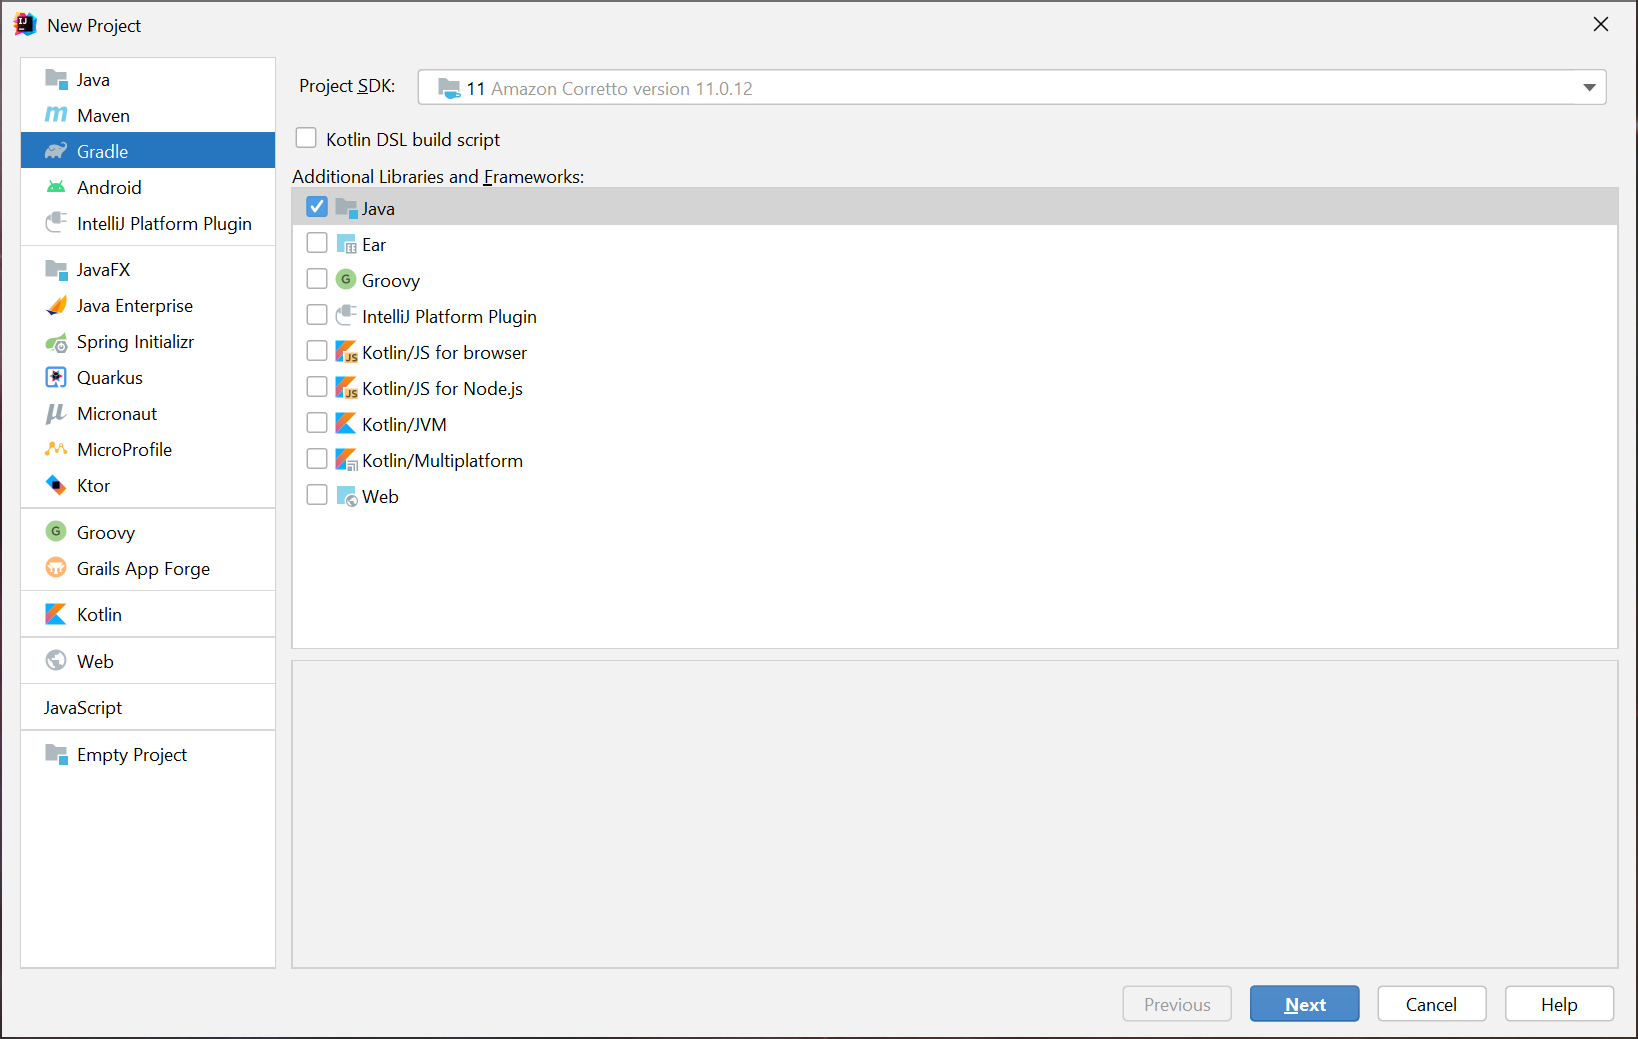
Click on the File/New/Project menu command (in the IntelliJ workspace) or the New Project button (in the Welcome to IntelliJ window) to display the New Project wizard.
-
In the left-hand panel, displaying the different types of projects, select Gradle.
-
Make sure that JDK 11 is selected in the Project SDK pull-down.
-
Leave the Kotlin DSL build script checkbox unchecked.
-
Make sure that the only checkbox selected in Additional Libraries and Frameworks is that for Java.
-
Click the Next button.
-
In the Name field, write the desired project name in
spinal-case(all lowercase letters or digits, with multiple words separated by dashes, and no other punctuation). -
Verify that the Location field contains a path that ends with
bootcamp/projects/, followed by the name specified in the previous step. If you need to change the the location, click the button on the far right of this field to browse to the correct location. However, when setting a location manually, the project name will not automatically be appended, so you must then edit the value shown, to make sure the location is a subdirectory ofbootcamp/projects, and notbootcamp/projectsitself.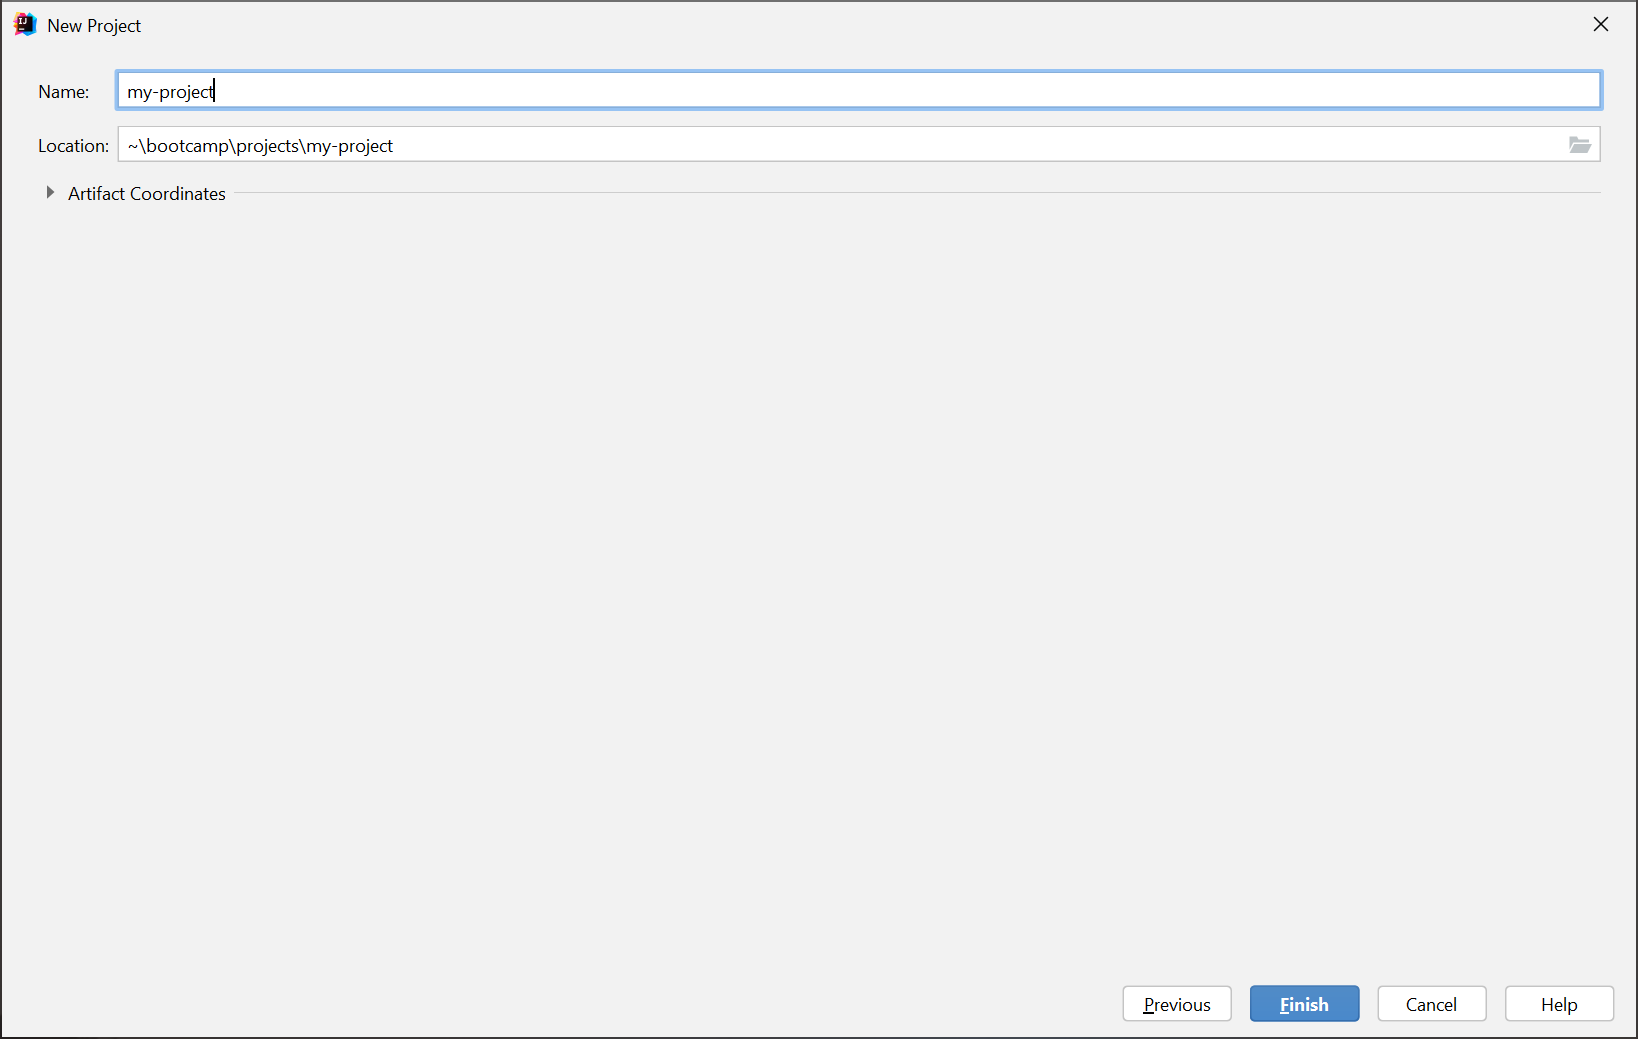
-
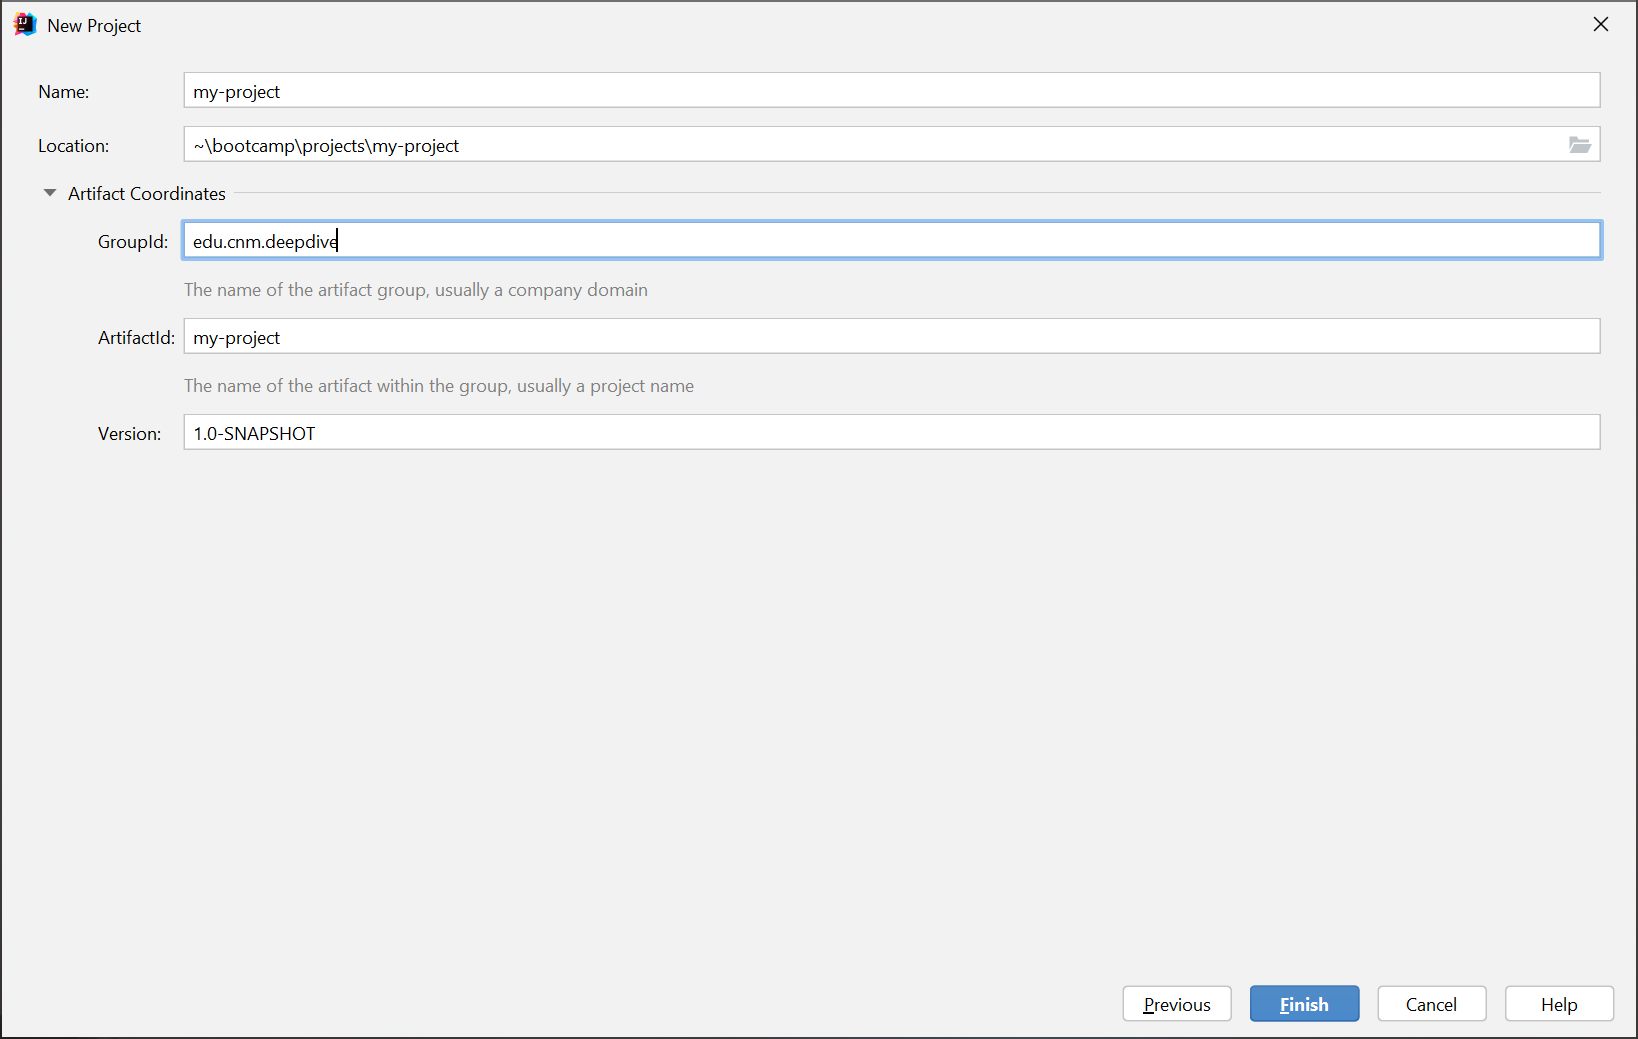
Expand the Artifact Coordinates control.
-
In GroupId, write “edu.cnm.deepdive”.
-
ArtifactId should already have the text you typed in the Name field; verify that the name is written in
spinal-casein both places. -
For now, leave Version unchanged.
-
Click the Finish button.
Modifying build.gradle
-
When the project has been loaded by IntelliJ, you should now see the
build.gradlefile open for editing. If not, locate it in the Project tool window and open it.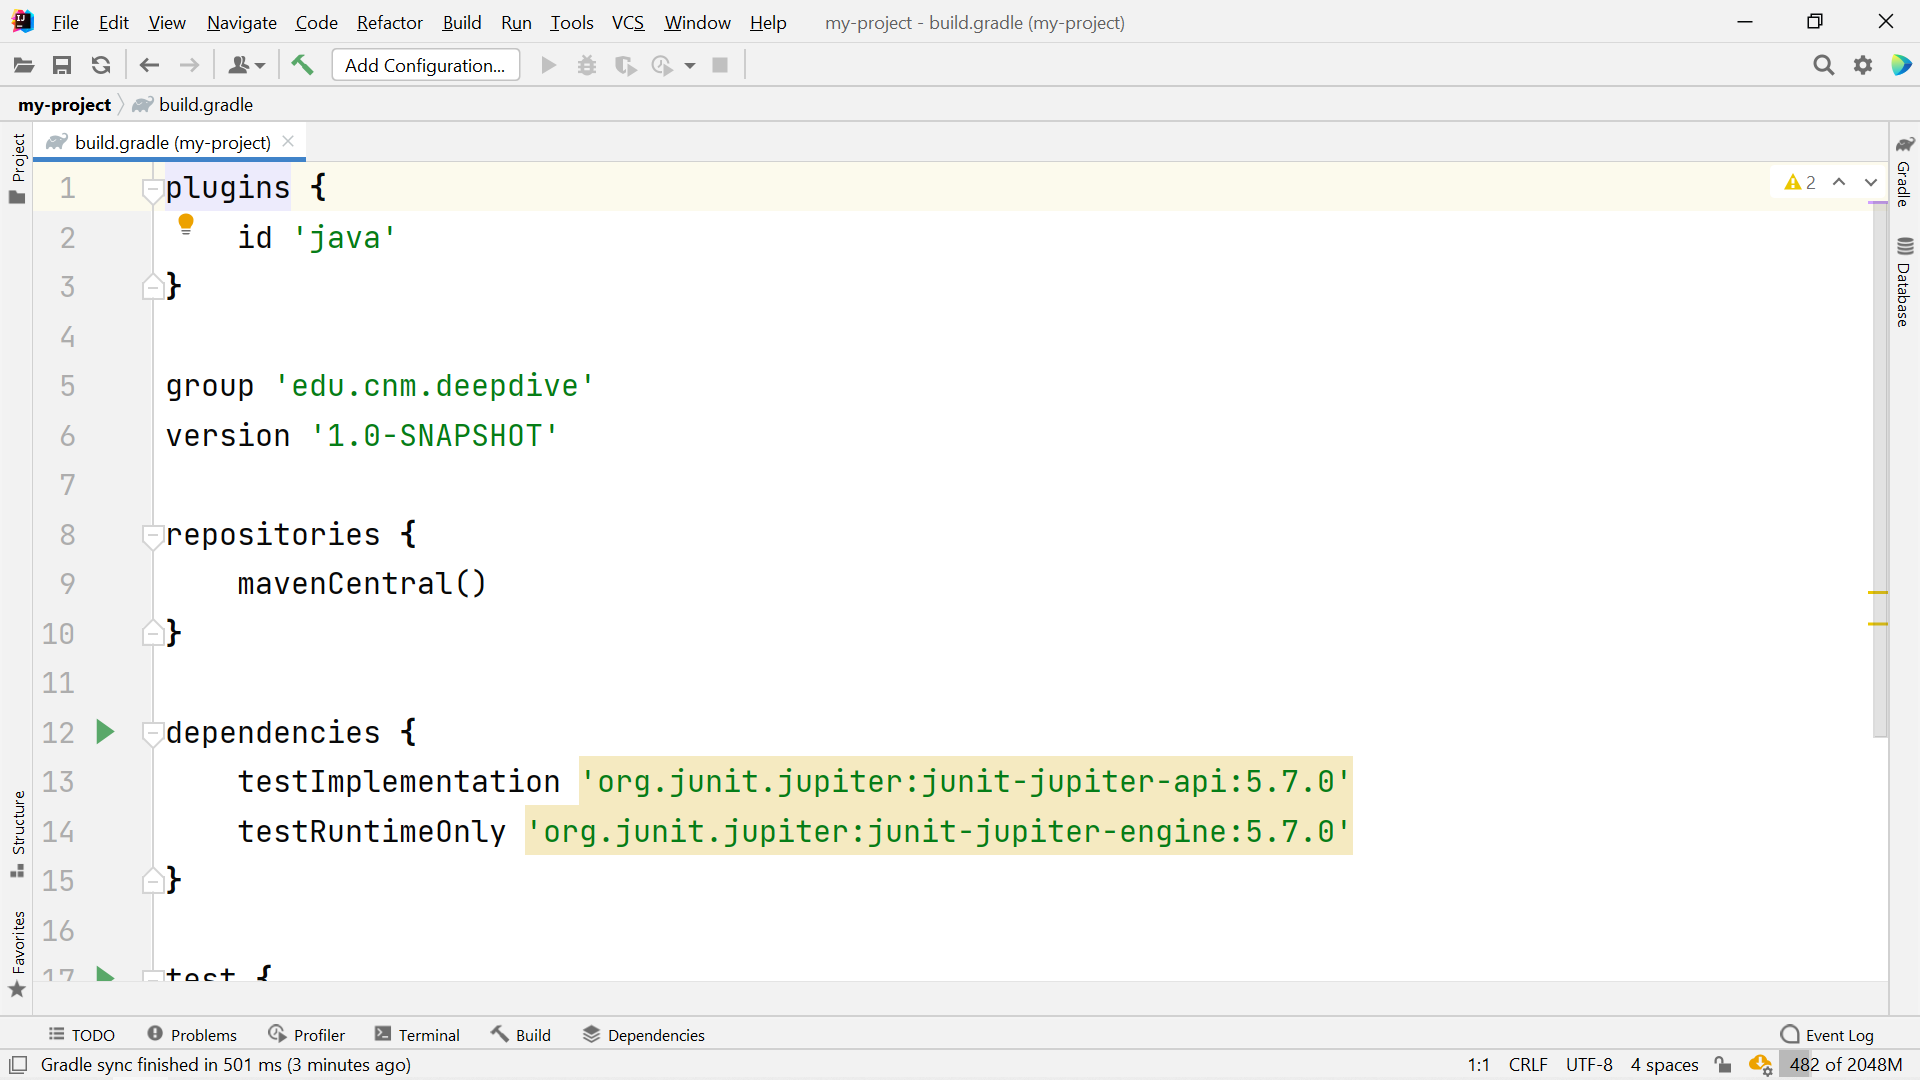
-
Write (or paste) the following immediately above the line that reads
group 'edu.cnm.deepdive'. (Remember: Spelling and lettercasing count!) This code instructs Gradle to select a JDK that can compile Java 11 code, and to configure the Java compiler to reject any language constructs added after Java 11, and to configure the compiler to generate bytecode compatible with the Java 11 virtual machine (JVM).java { toolchain { languageVersion = JavaLanguageVersion.of(11) } }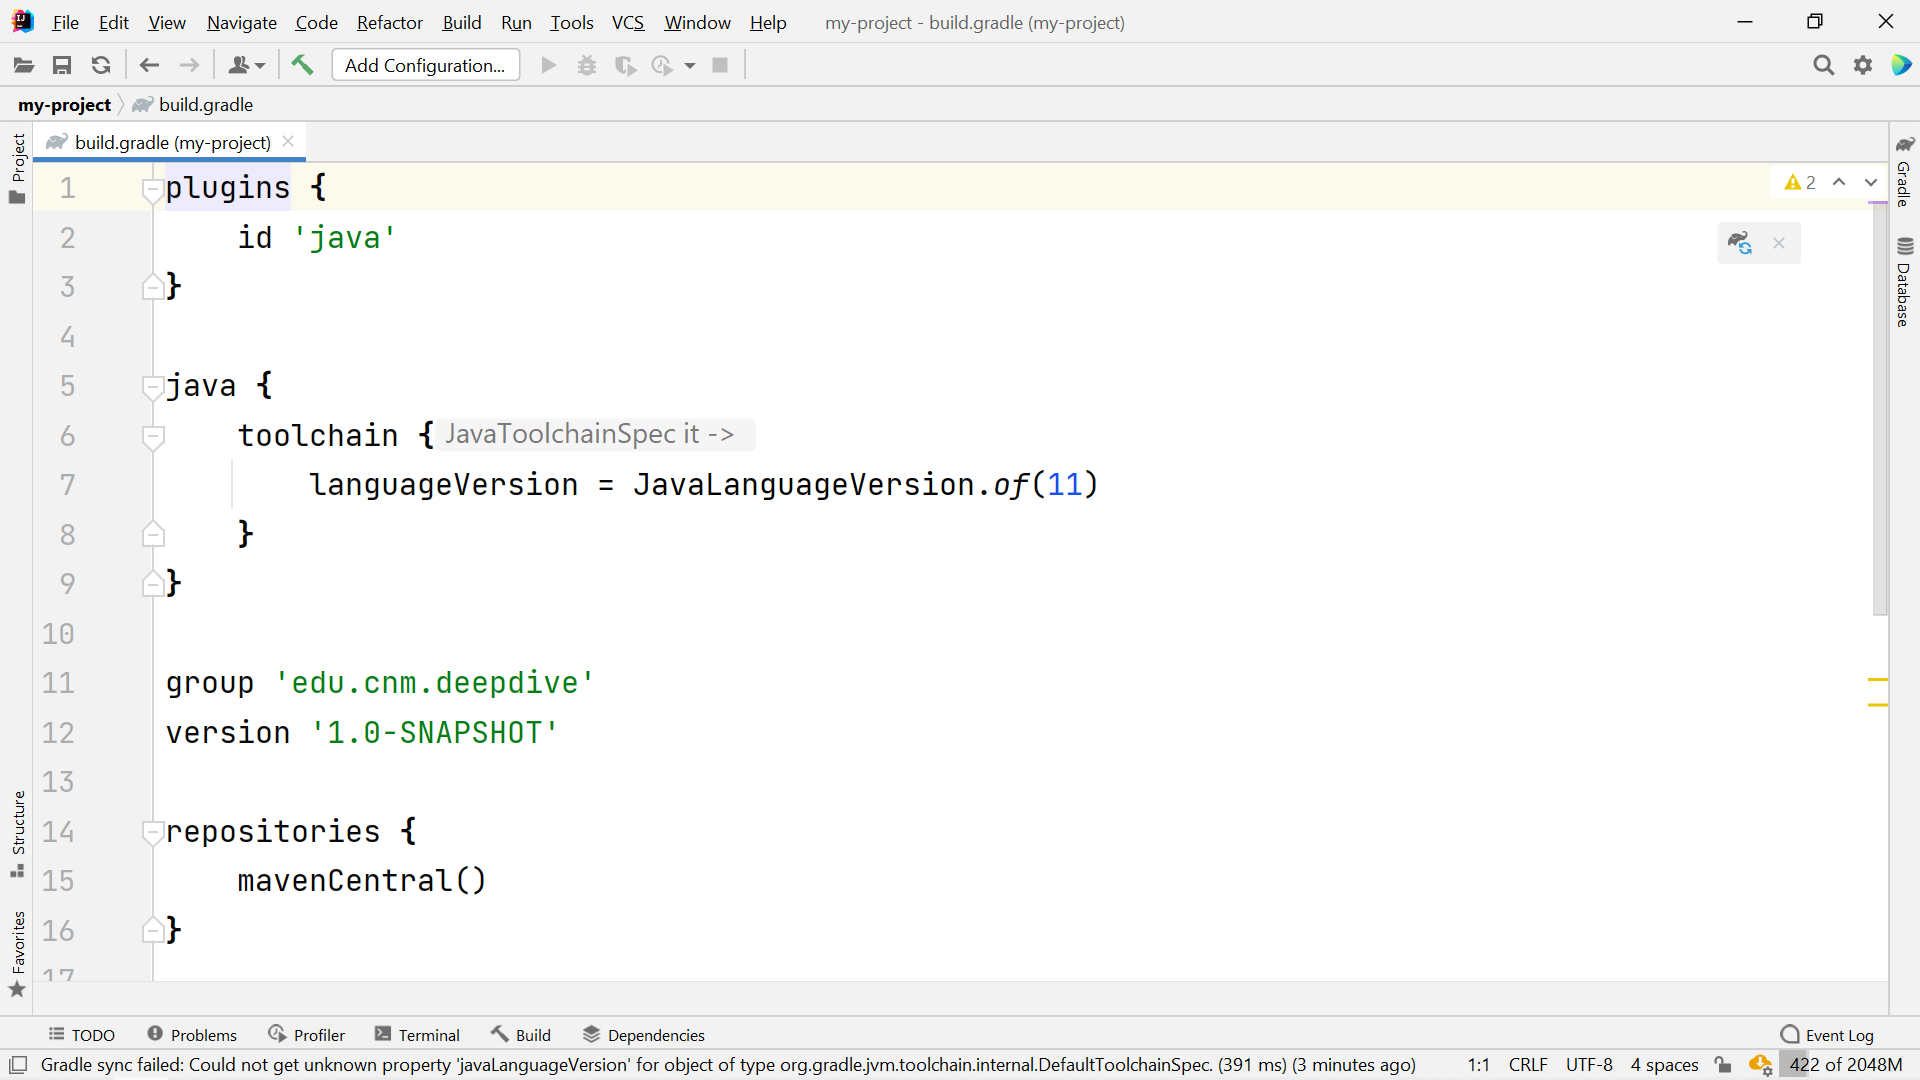
-
Create a new line inside the
dependenciesbraces, just after the opening brace. -
In the new line, write (or paste) this statement, which declares a new variable,
junitVersion, and assigns it the string value'5.8.1':def junitVersion = '5.8.1' -
In the two lines below the variable you declared and assigned in the previous step, change the single quotes to double quotes.
-
In the line that starts with
testImplementation, remove the-apithat followsjupiterand precedes the colon character. (Do not delete the colon character.) -
In both of the lines starting with
testImplementationortestRuntimeOnly, replace the current version number (after the final colon character, and before the closing double quote) with$junitVersion; the latter must be spelled and cased exactly as you declared it, in step 17, but with the dollar sign ($) prepended.You should now have the following for the
dependenciessection:dependencies { def junitVersion = '5.8.1' testImplementation "org.junit.jupiter:junit-jupiter:$junitVersion" testRuntimeOnly "org.junit.jupiter:junit-jupiter-engine:$junitVersion" } -
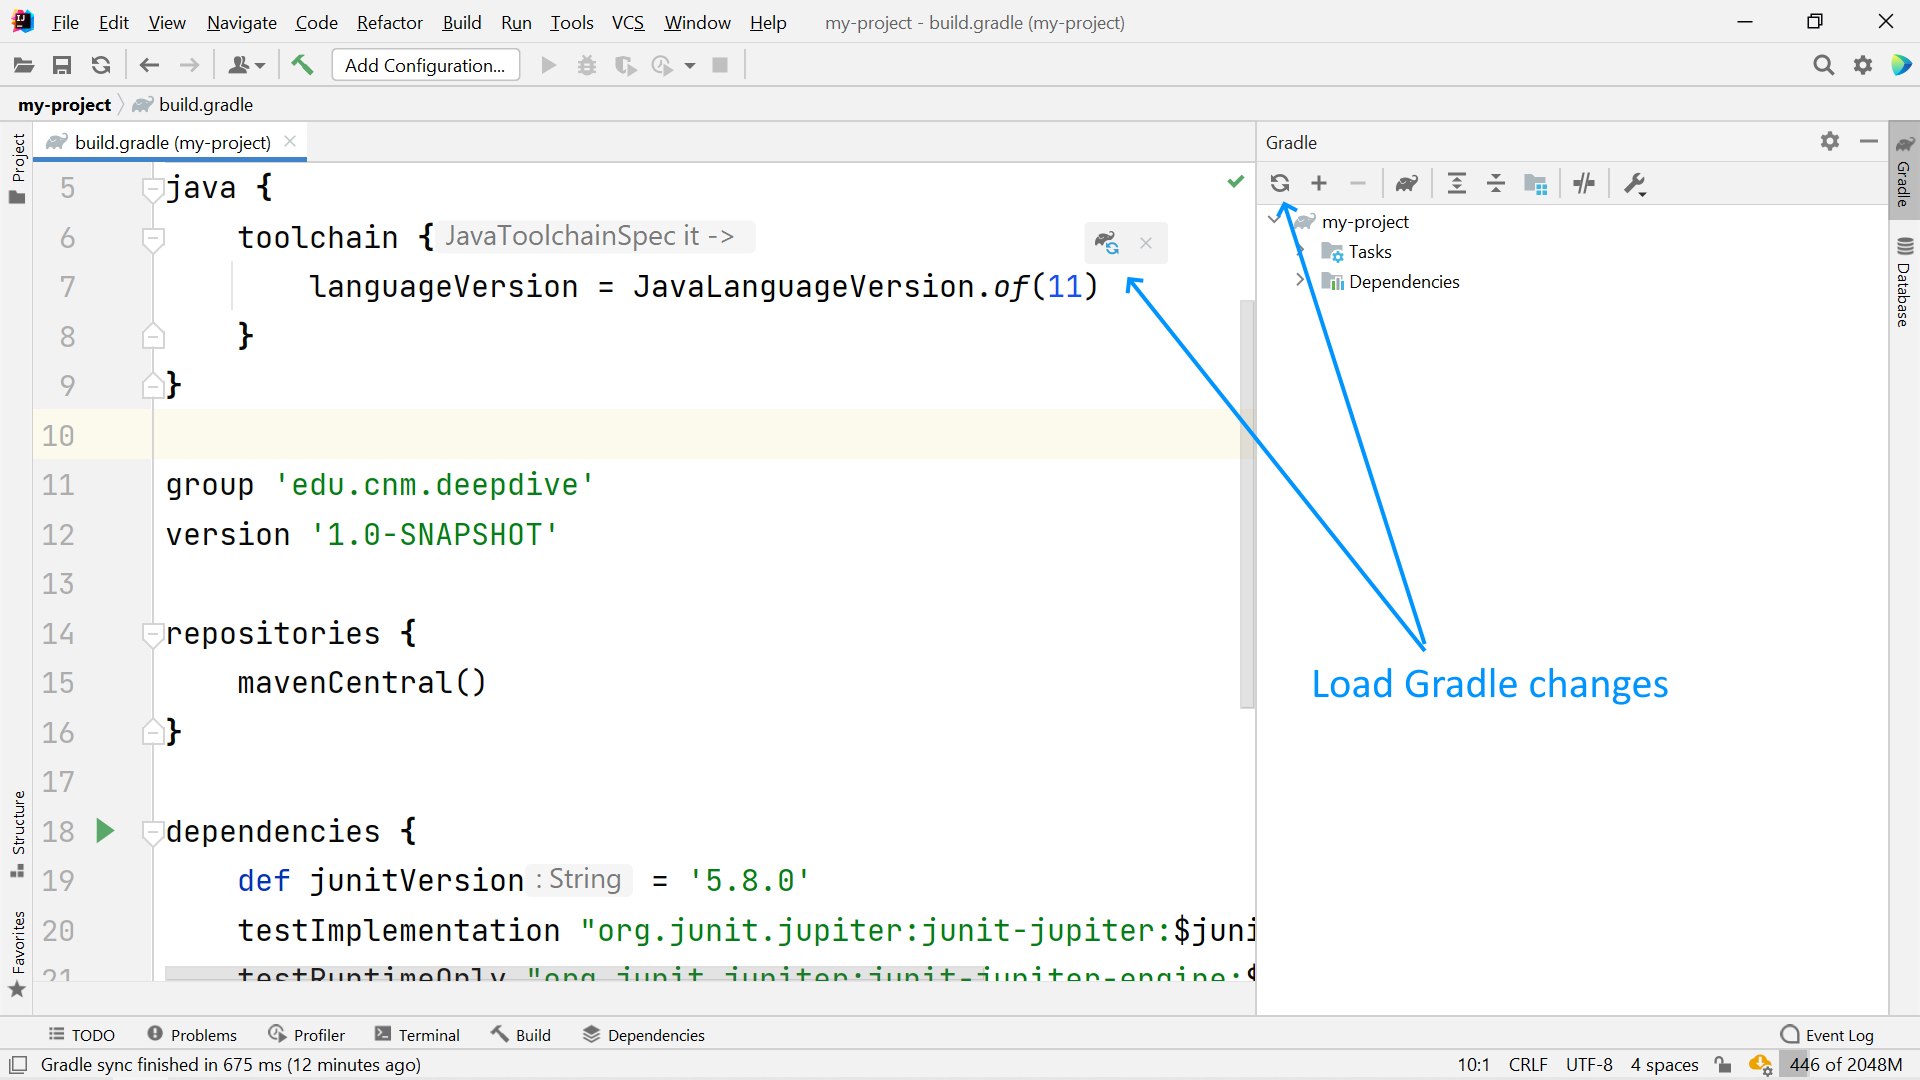
Click on the reload icon at the top of the Gradle tool window, or the one displayed with the floating Gradle logo, to instruct Gradle to reload the build script.
-
If any errors messages are displayed, look for and correct unbalanced braces, misspellings, etc.