
Like most widely used software packages, IntelliJ IDEA is updated frequently. In order to cut down on the time needed for downloading and applying updates during the course, and to spot potential issues as soon as possible, it’s a good idea to apply the latest updates available a few days before the bootcamp begins.
Tasks
Using the JetBrains Toolbox
If IntelliJ IDEA was installed using the JetBrains Toolbox, the main application update must be done with the Toolbox as well (otherwise, proceed directly to the “Using the in-application updater” instructions.
-
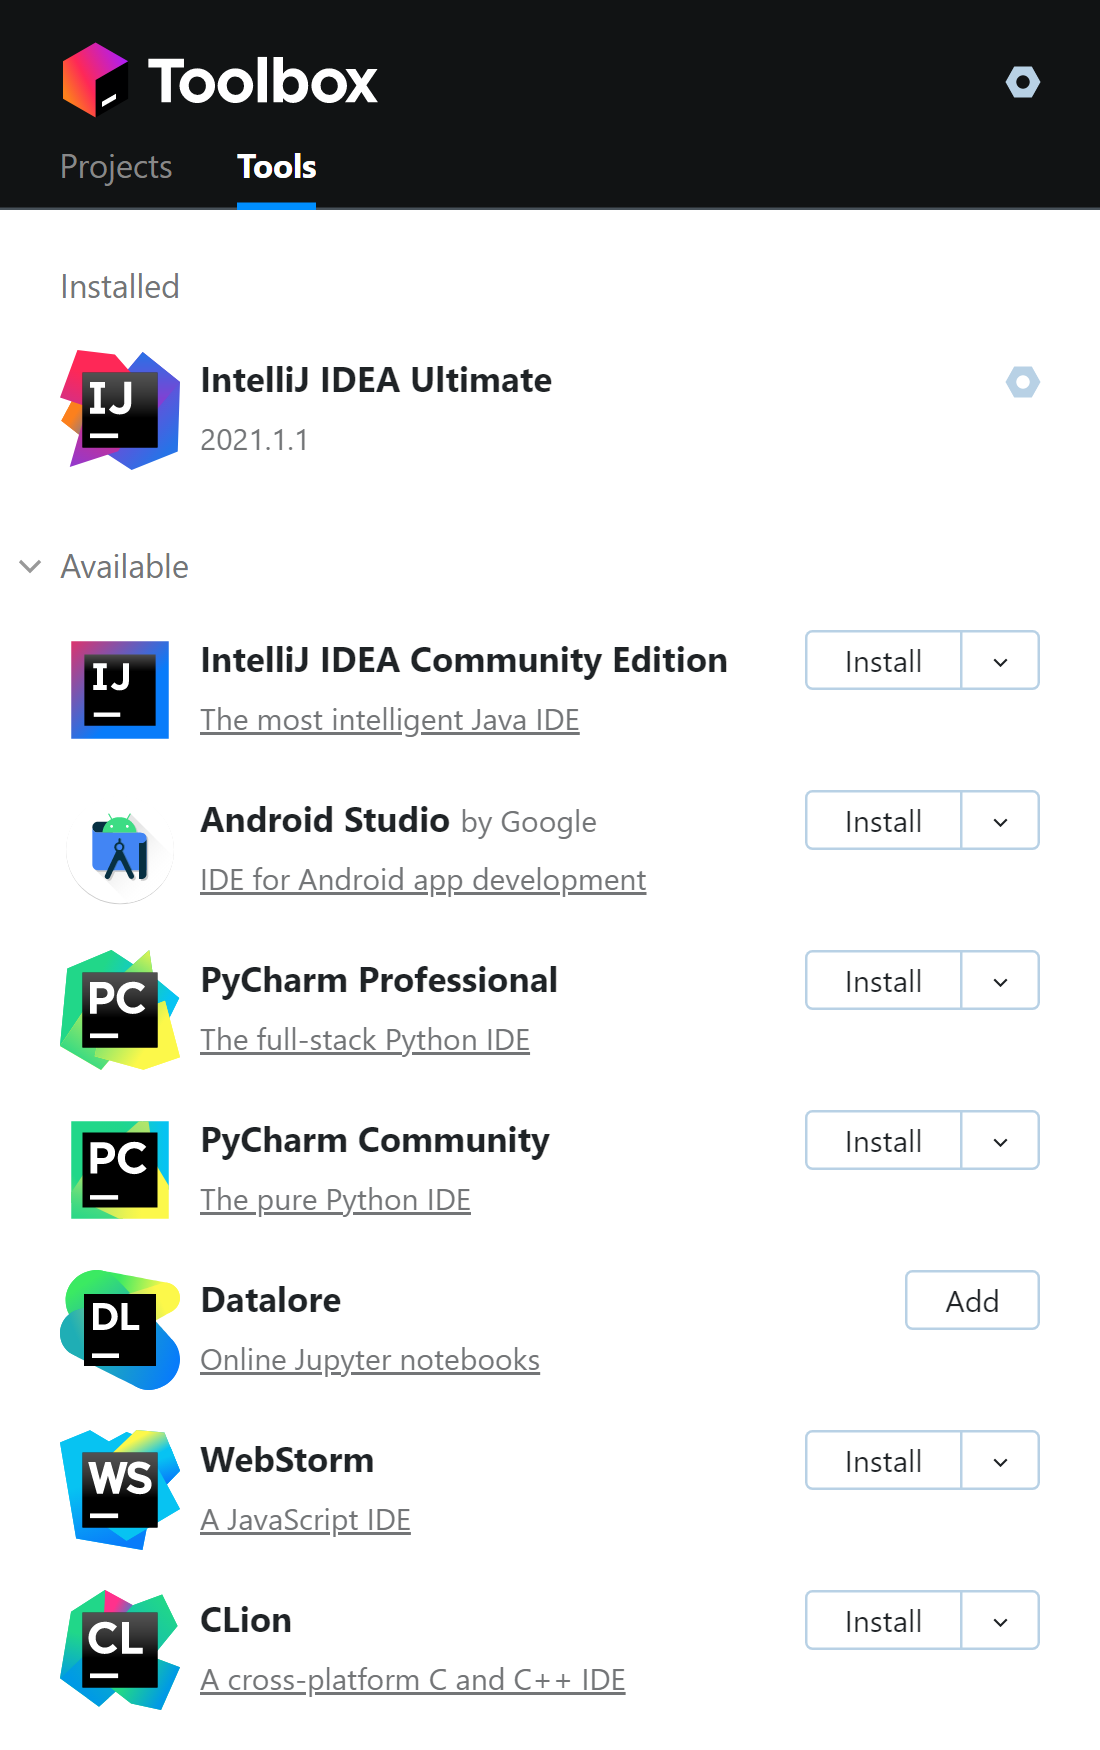
Open the JetBrains Toolbox (from the notification area in the bottom-right corner of the screen in Windows; from the menu bar in the top-right corner of the screen on OS X).
-
If an Update or Upgrade button appears next to IntelliJ IDEA Ultimate in the Installed part of the list, click it. This will download and update the installed copy of IntellIJ IDEA.
-
After installation is complete, continue to the next section to update any plug-ins or other components.
Using the in-application updater
-
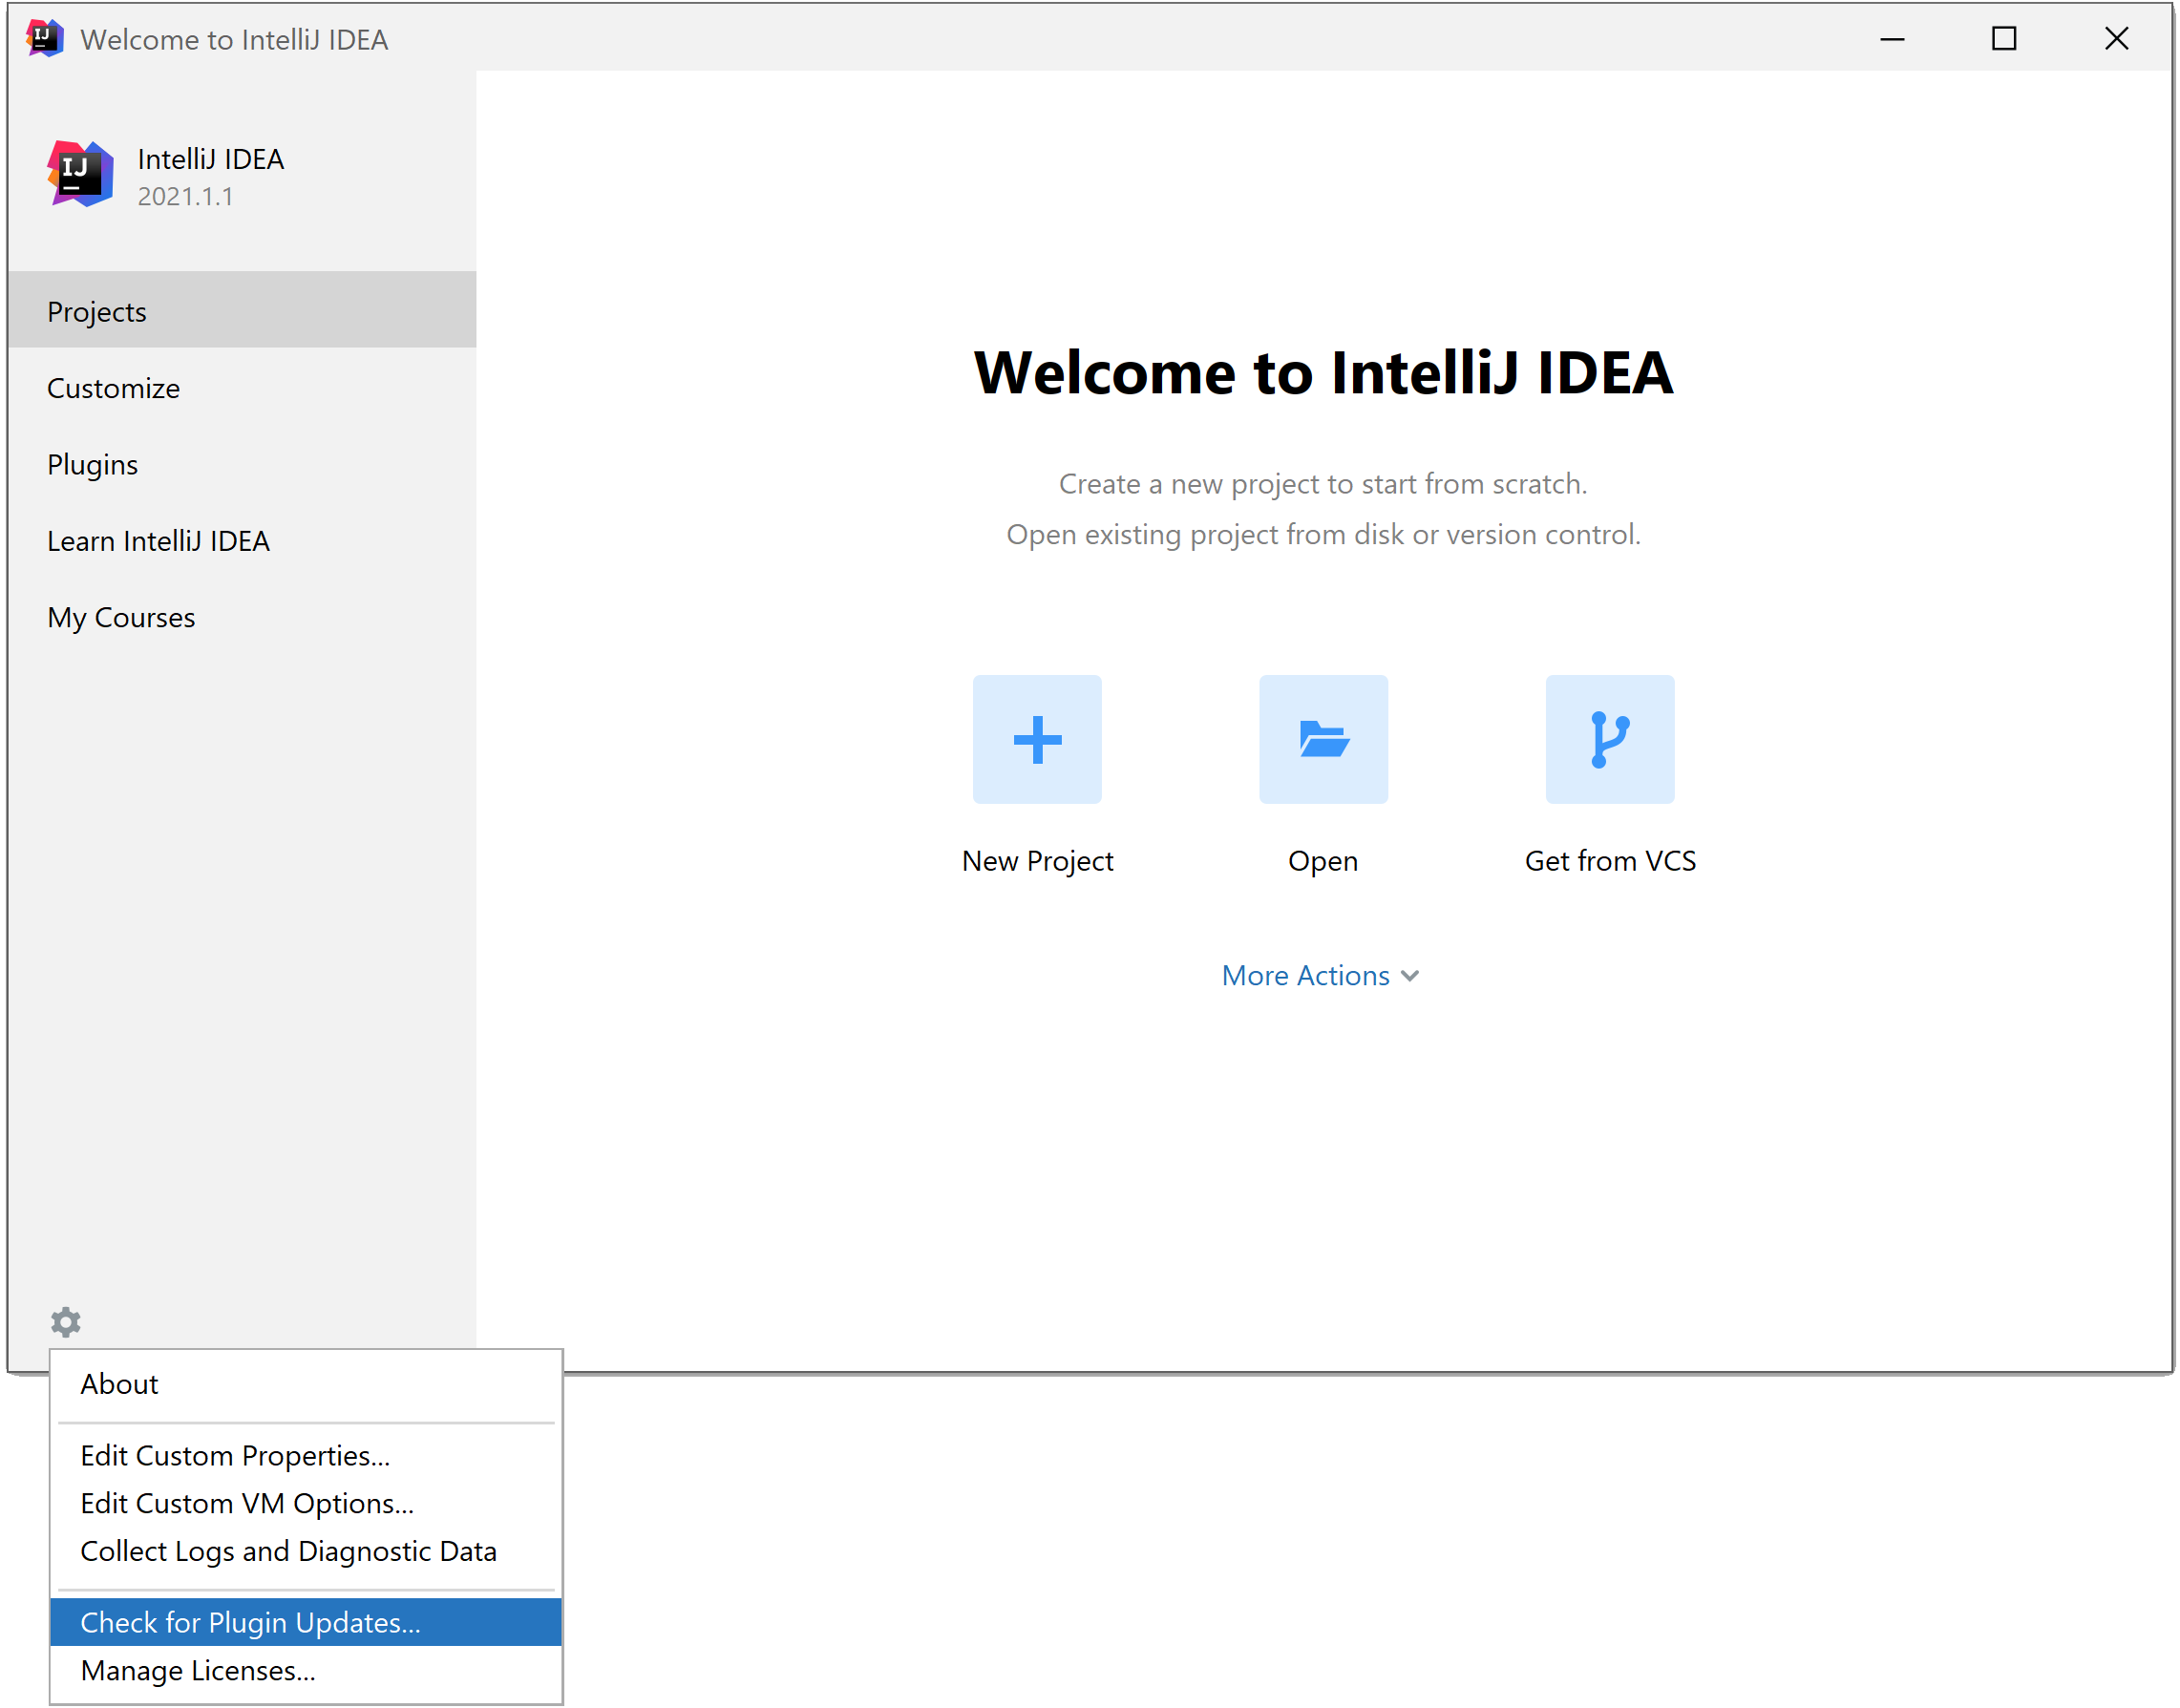
In the IntelliJ IDEA welcome screen, click the gear icon in the lower left and select Check for Plugin Updates (or Check for Updates) command.
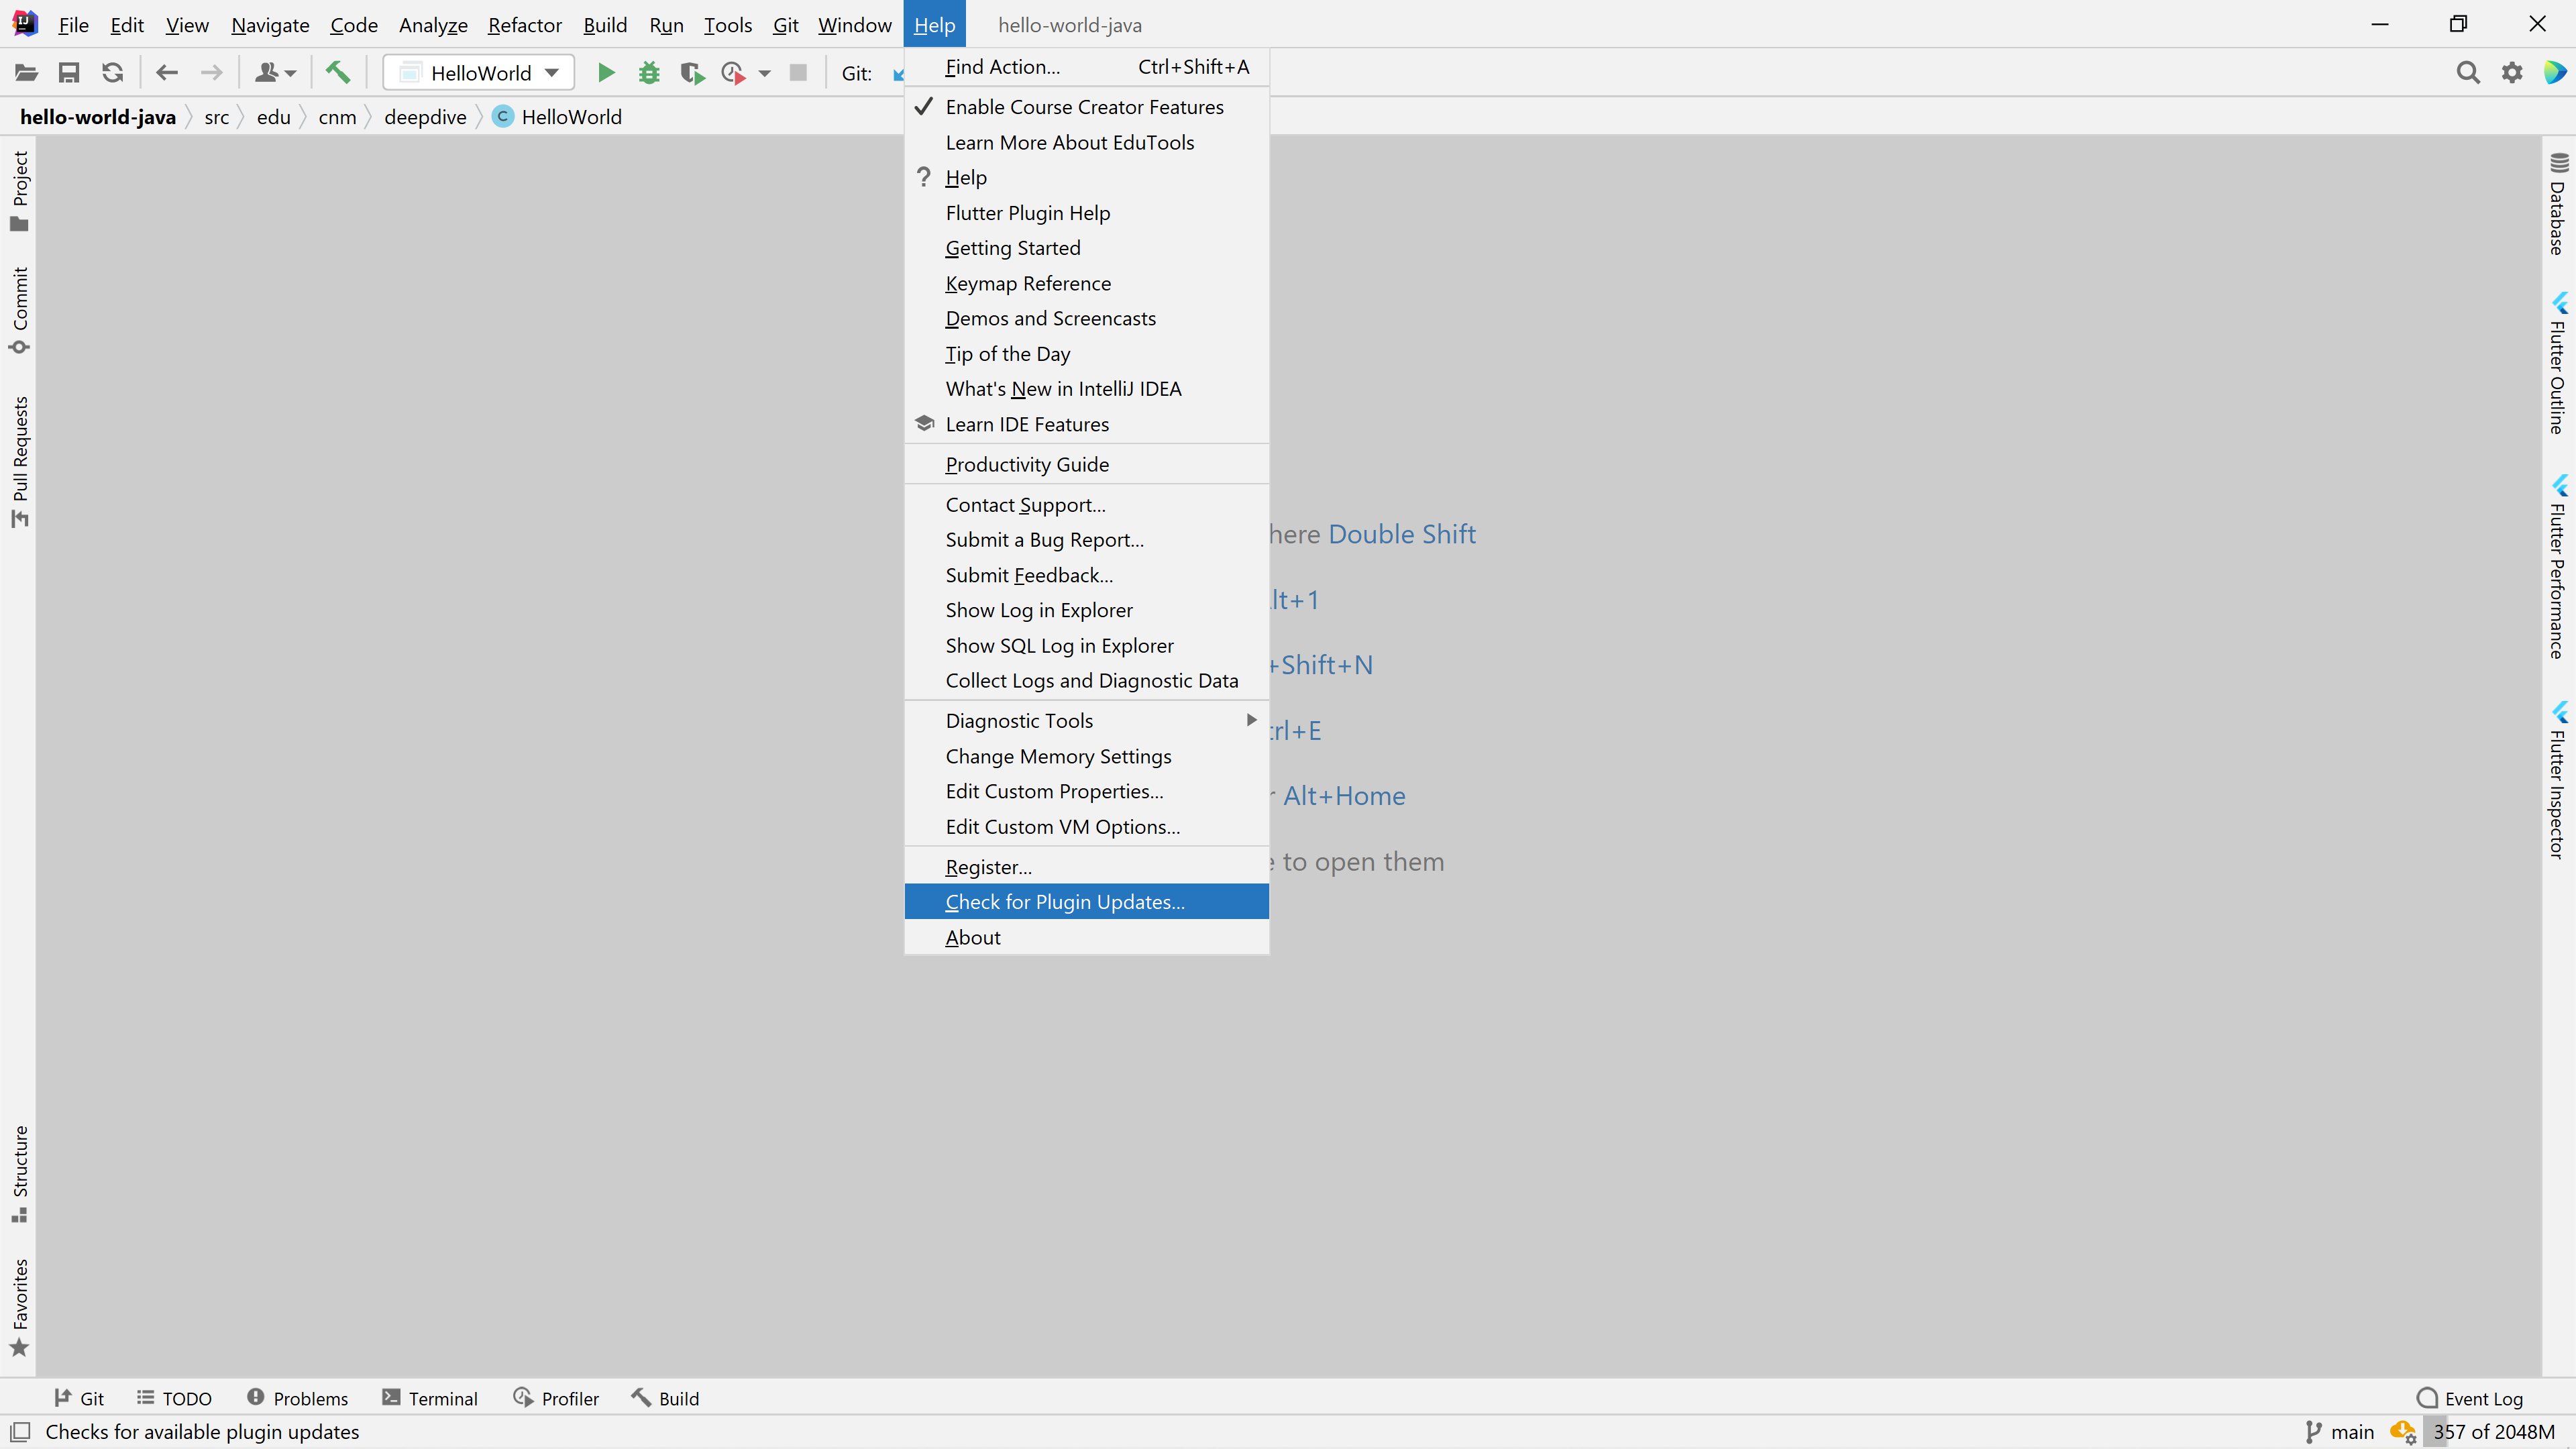
If IntelliJ IDEA opens with a project displayed, select the Help/Check for Plugin Updates (or Help/Check for Updates) menu command.
-
If no updates are available, a message to that effect is displayed; in that event, skip the remaining steps.
-
If the IDE and Plugin Updates (or similar) window is displayed, click the Update, Update Now, or Update and Restart button to download and apply the updates.
-
If Update and Restart was clicked in step 3, IntelliJ IDEA will restart automatically when the update is complete; otherwise, if a restart of IntelliJ IDEA is required, a prompt to that effect will be displayed.